Azure Container Apps Configurations in Azure Portal
🧱 Service Inputs
Azure Container Apps – Portal Configuration Steps
Login to Azure Portal
Open the Azure Portal and sign in using your Azure account.
https://portal.azure.com/auth/login/Go to Resource group
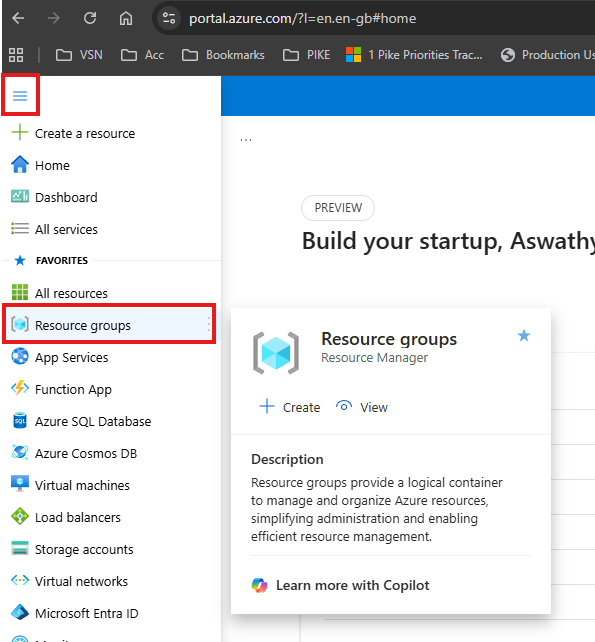
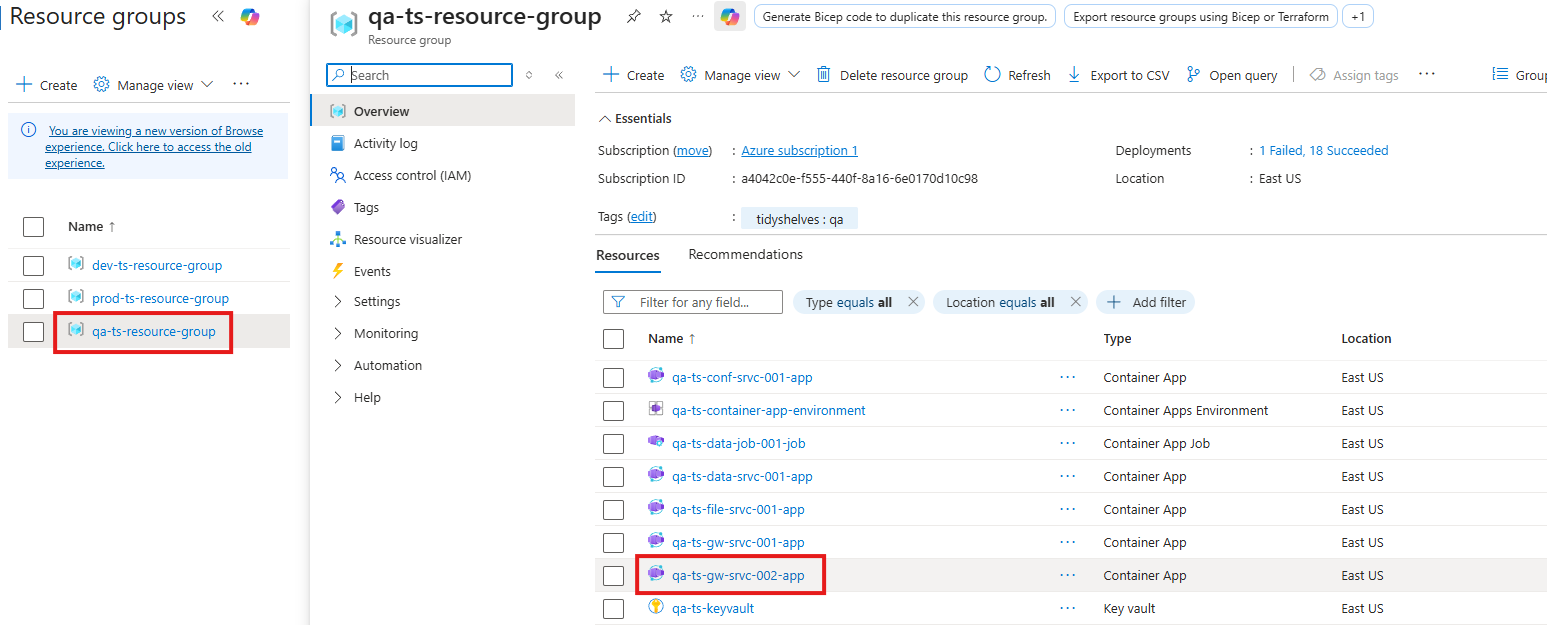
Select the target Resource Group
dev-se-resource-group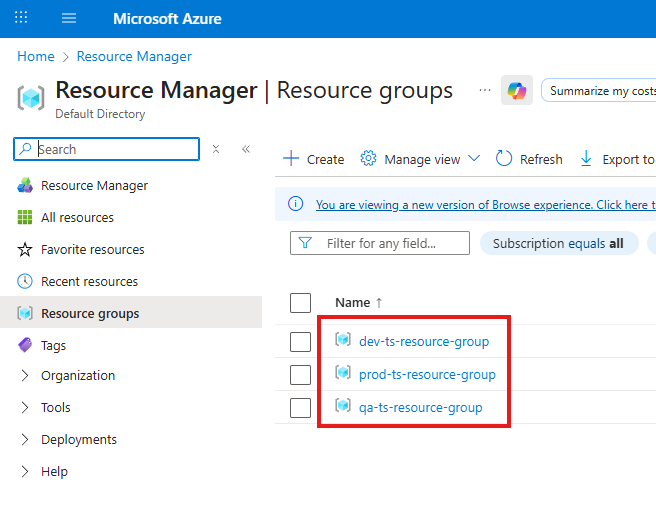
Select the Container App
Go to Containers → Environment variables → Add → Save as a new revision
AC_SE_ENVManual entrydev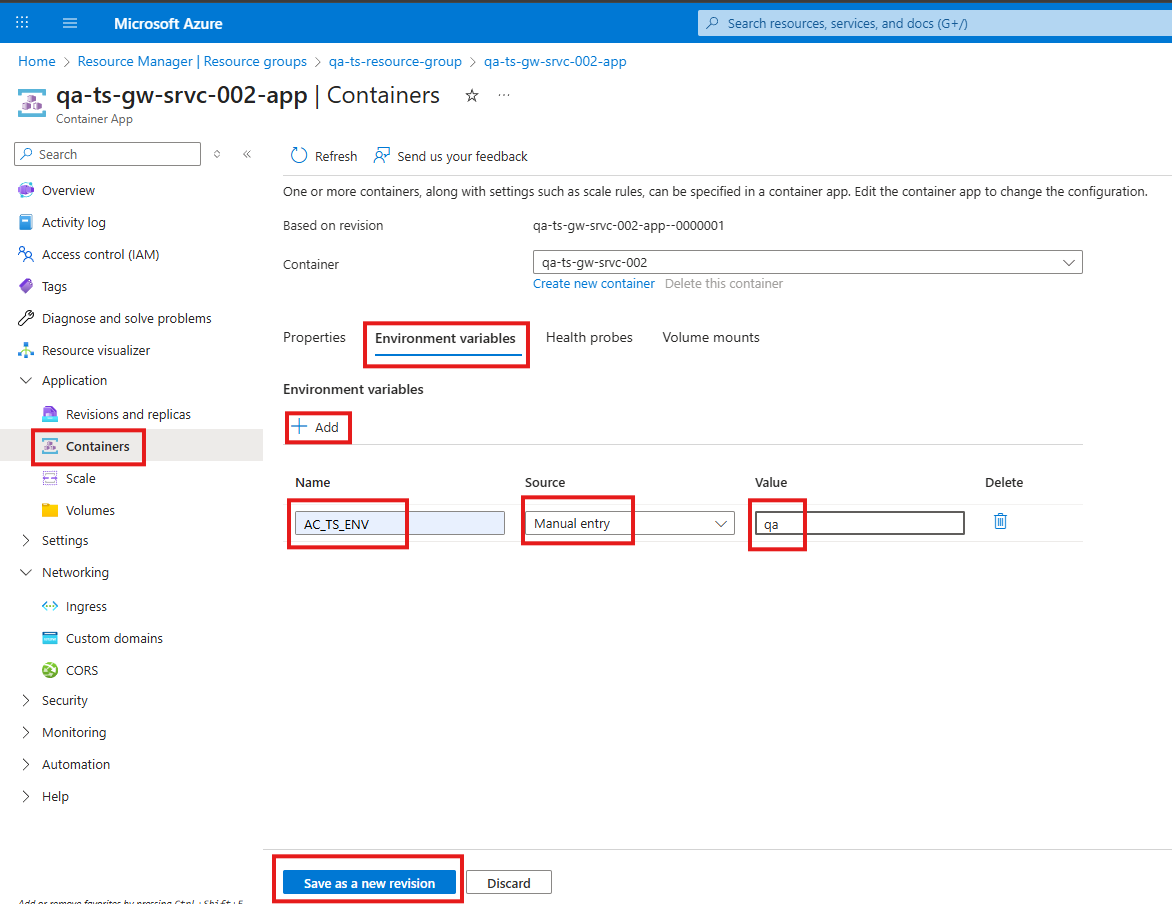
Go to Scale → Set Min Replicas to 0 (from 1) → Save as a new revision
0
Ingress
- Gateway
- Service
Go to Ingress → Select Ingress traffic as Accepting traffic from anywhere → Save
Accepting traffic from anywhere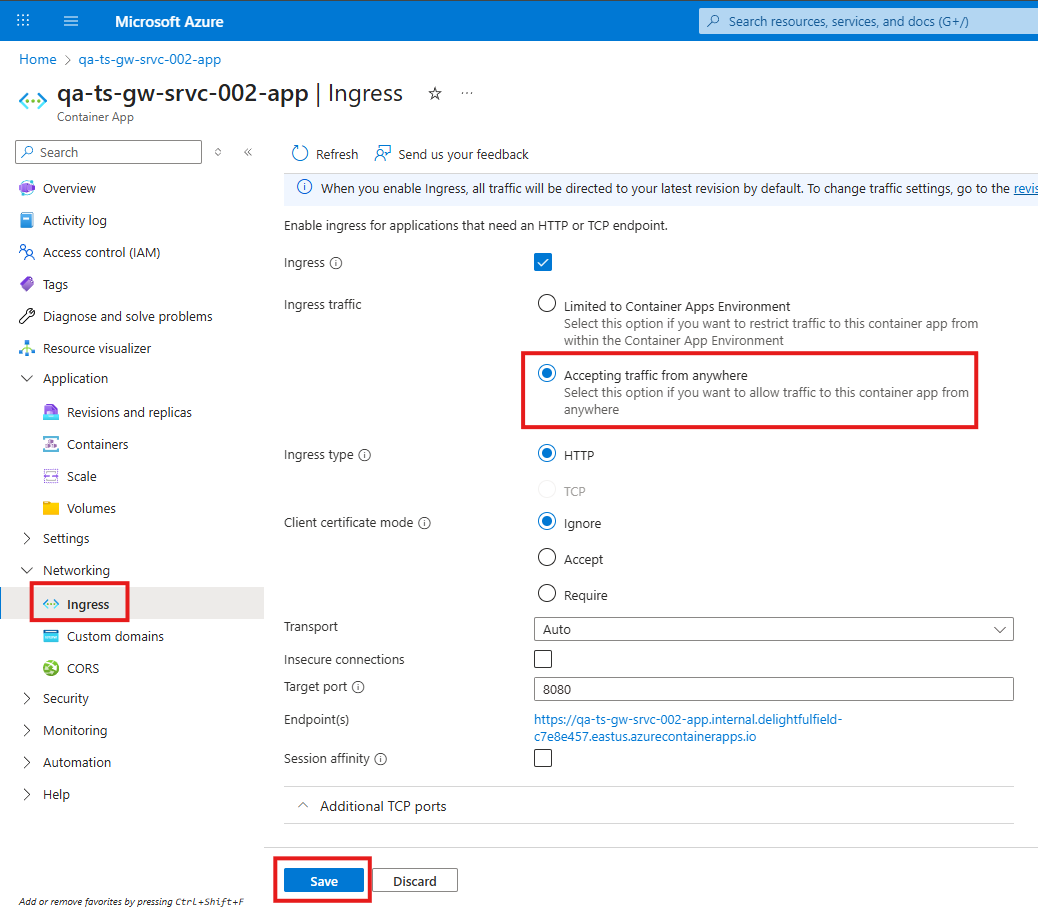
Go to Ingress → Select Ingress traffic as Limited to Container Apps Environment → Save
Limited to Container Apps Environment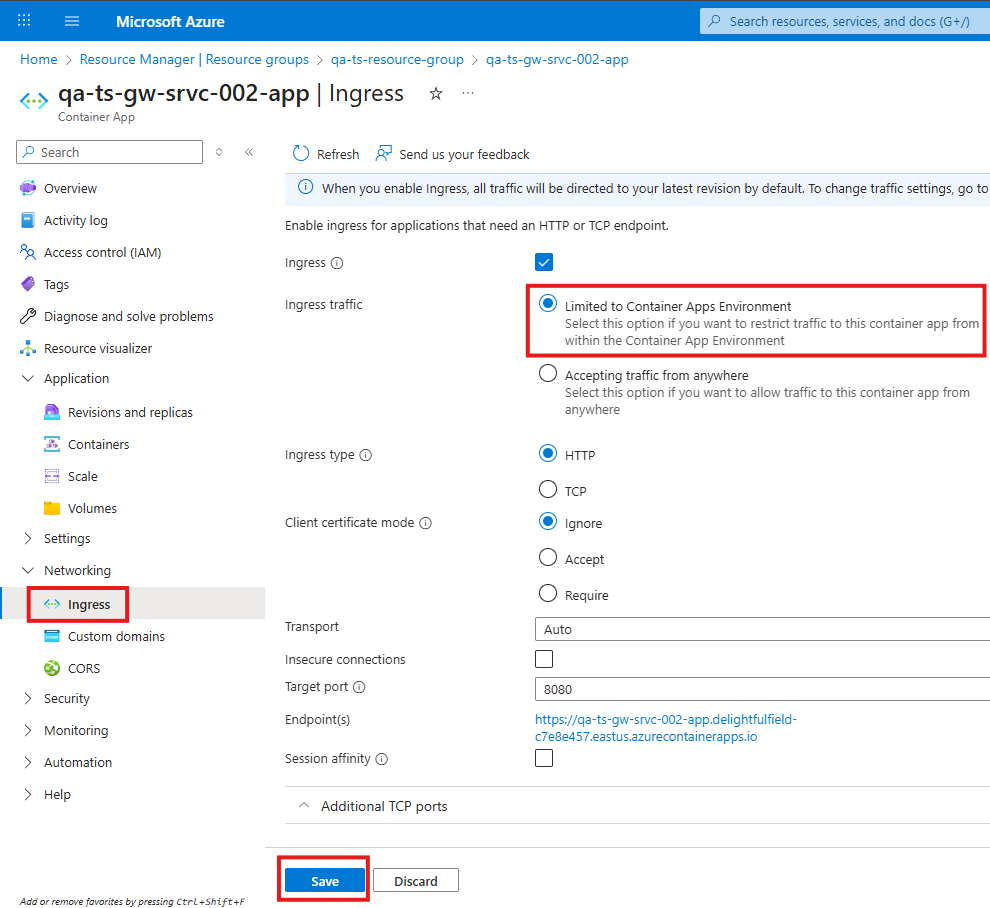
Custom domains (Only for Gateway)
- Managed certificate
- Add certificate later
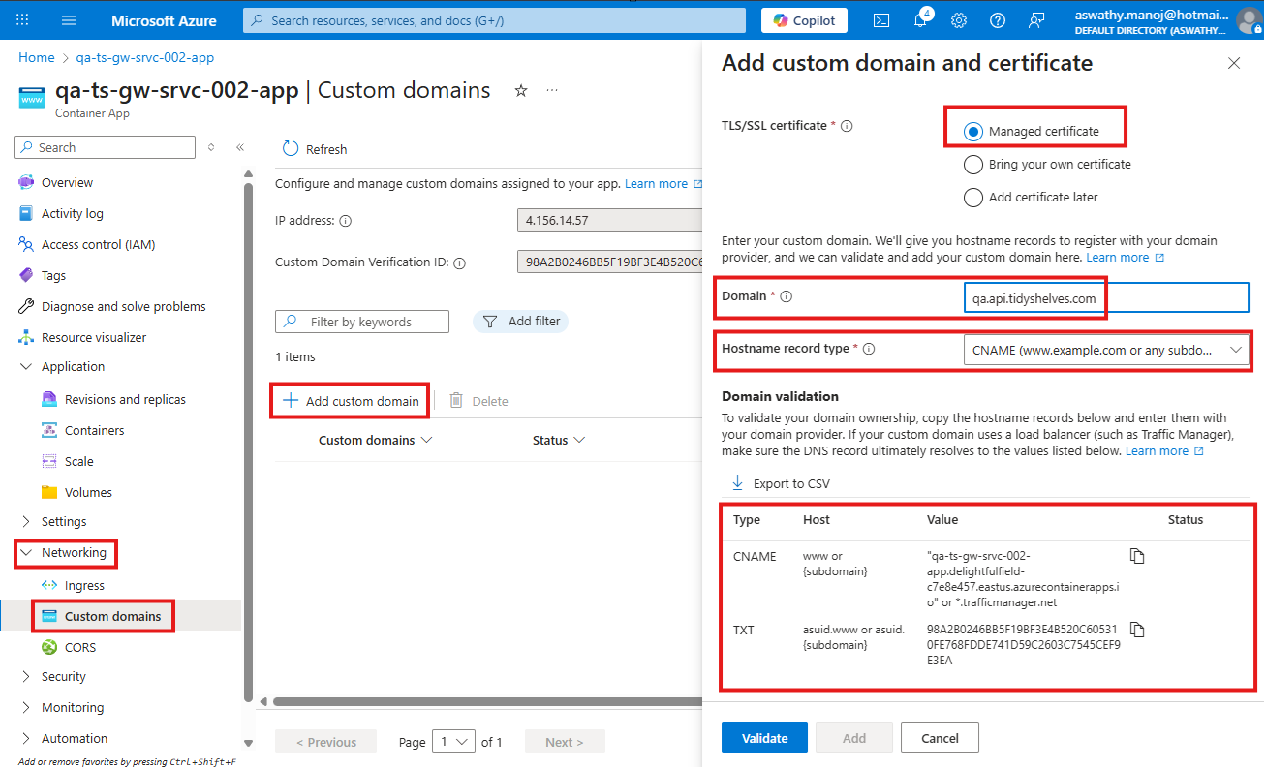
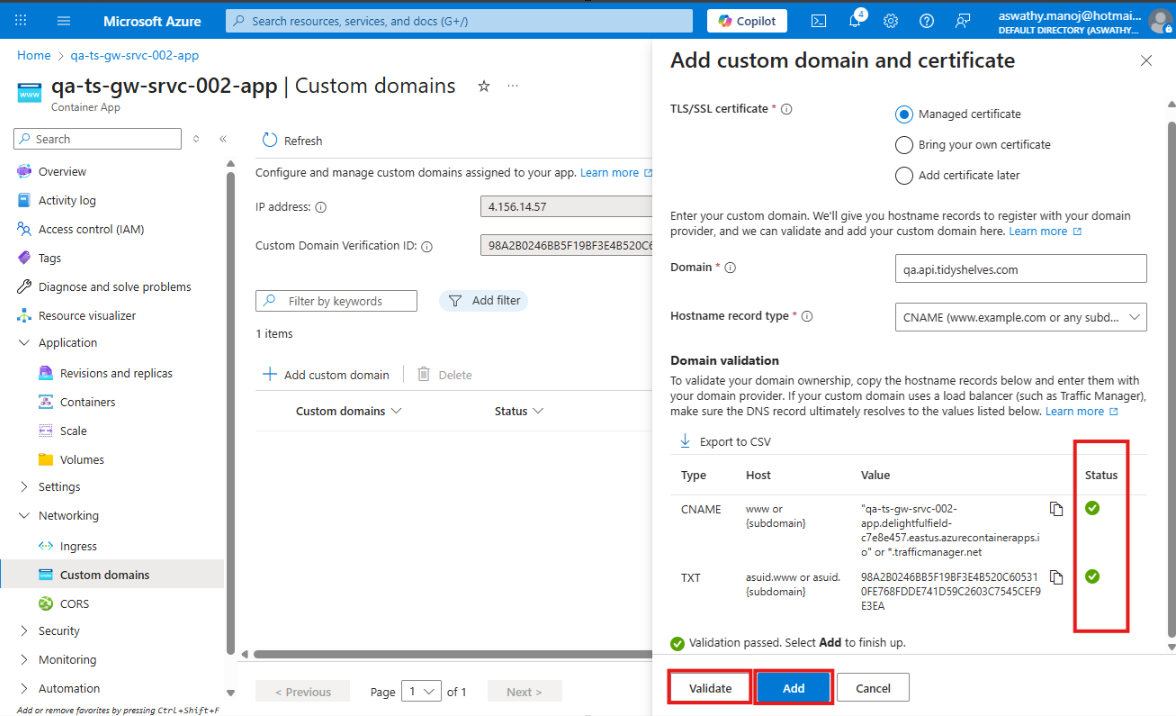
Go to Networking → Custom domains → Add custom domain → Set TLS/SSL certificate to Managed certificate.
- Dev / QA
- Prod
dev.api.tidyshelves.comMake a note of the following values and add them as Cloudflare DNS records.
CNAME
dev.api⚠️ Copy and save the Value shown in Azure Portal, for later use of CNAME record in Cloudflare
TXT
asuid.dev.api⚠️ Copy and save the Value shown in Azure Portal, for later use of TXT record in Cloudflare
api.tidyshelves.comMake a note of the following values and add them as Cloudflare DNS records.
CNAME
api⚠️ Copy and save the Value shown in Azure Portal, for later use of CNAME record in Cloudflare
TXT
asuid.api⚠️ Copy and save the Value shown in Azure Portal, for later use of TXT record in Cloudflare
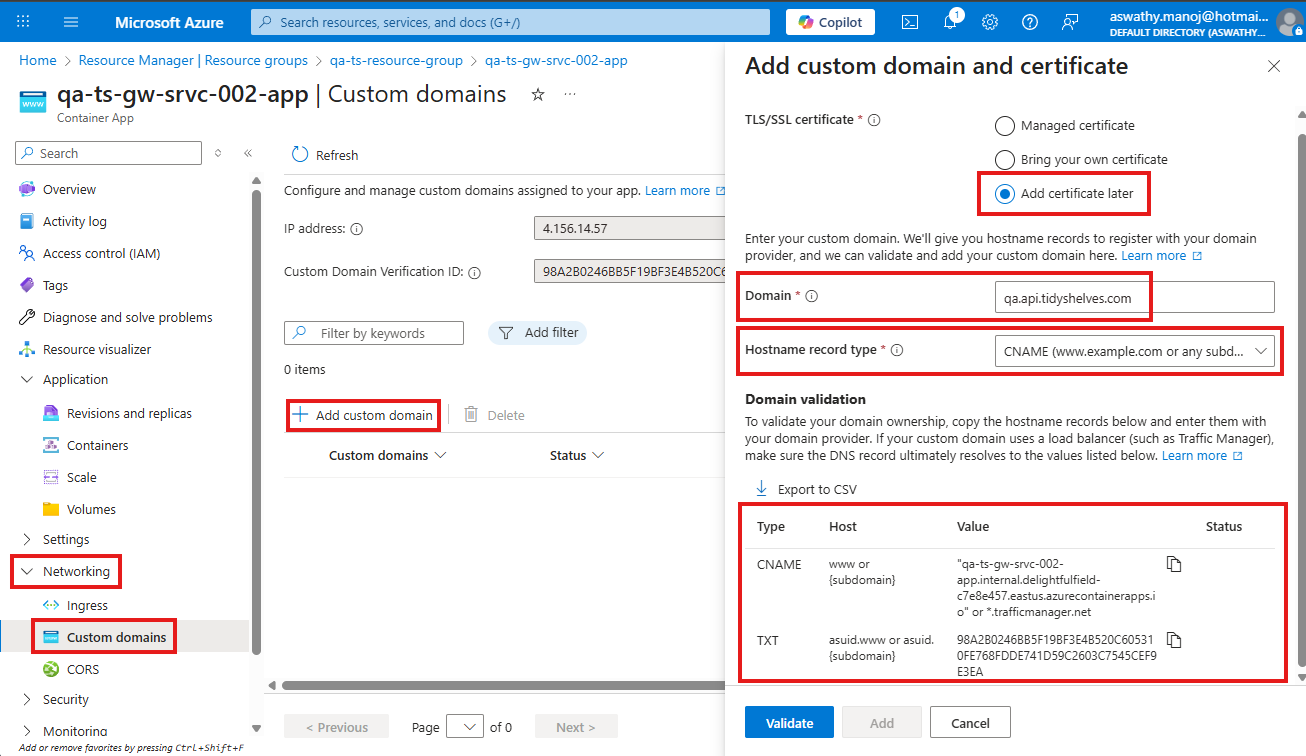
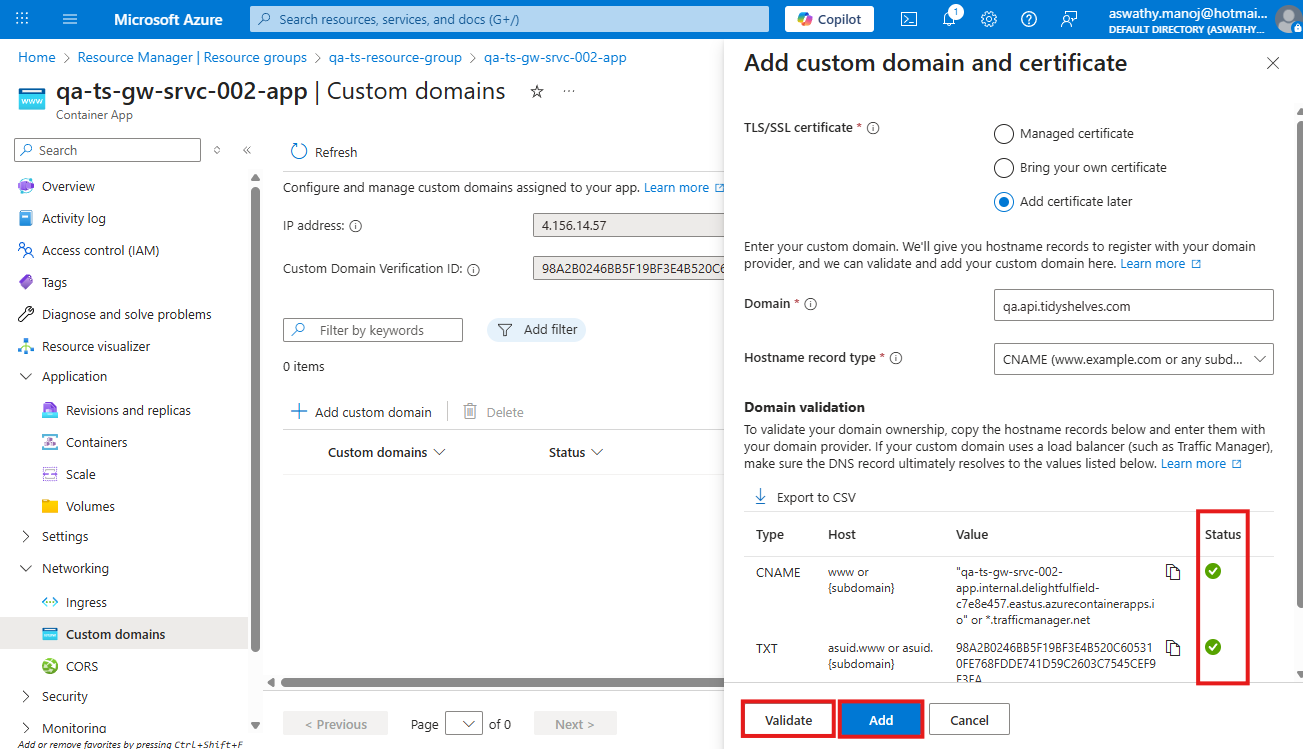
Go to Networking → Custom domains → Add custom domain → Set TLS/SSL certificate to Add certificate later.
- Dev / QA
- Prod
dev.api.tidyshelves.comMake a note of the following values and add them as Cloudflare DNS records.
CNAME
dev.api⚠️ Copy and save the Value shown in Azure Portal, for later use of CNAME record in Cloudflare
TXT
asuid.dev.api⚠️ Copy and save the Value shown in Azure Portal, for later use of TXT record in Cloudflare
api.tidyshelves.comMake a note of the following values and add them as Cloudflare DNS records.
CNAME
api⚠️ Copy and save the Value shown in Azure Portal, for later use of CNAME record in Cloudflare
TXT
asuid.api⚠️ Copy and save the Value shown in Azure Portal, for later use of TXT record in Cloudflare
Go to Cloudflare → Login
Open Cloudflare and log in using your Cloudflare account.
https://www.cloudflare.com/en-gb/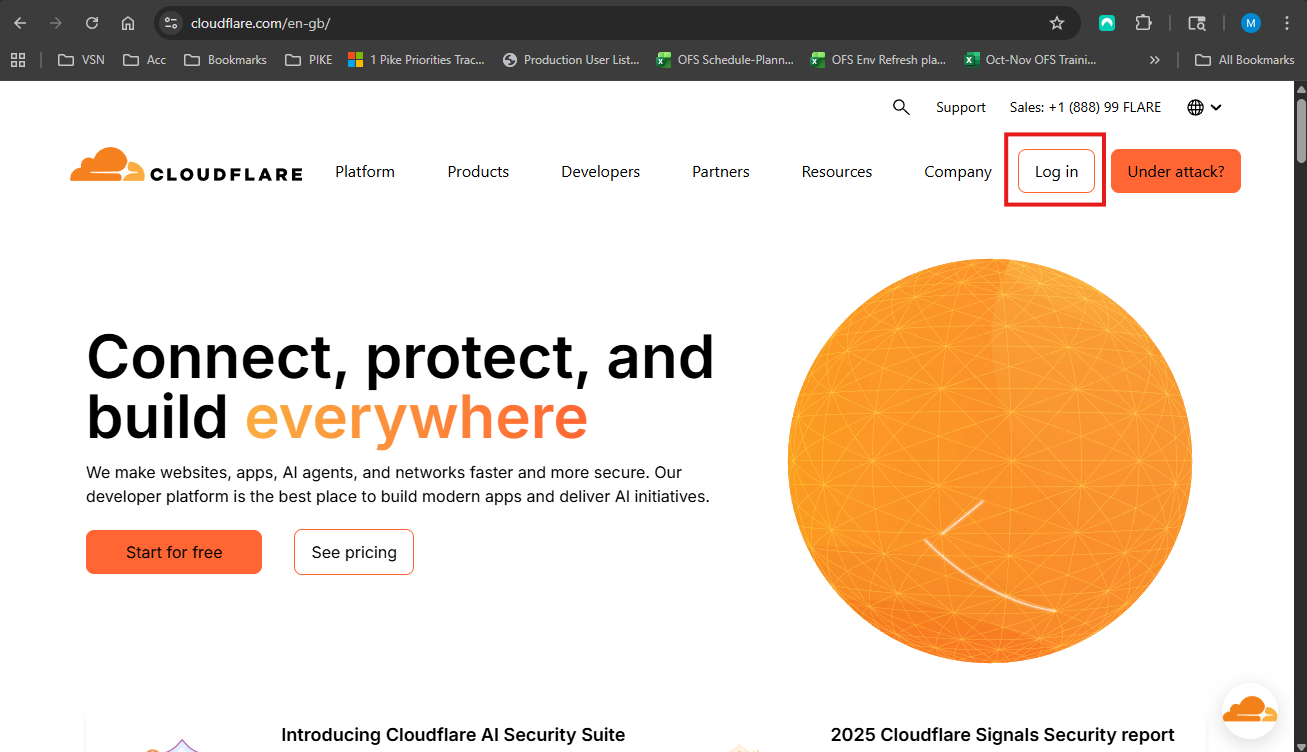
Go to Account Home
From the Cloudflare dashboard, click on the domain listed under your account.
tidyshelves.com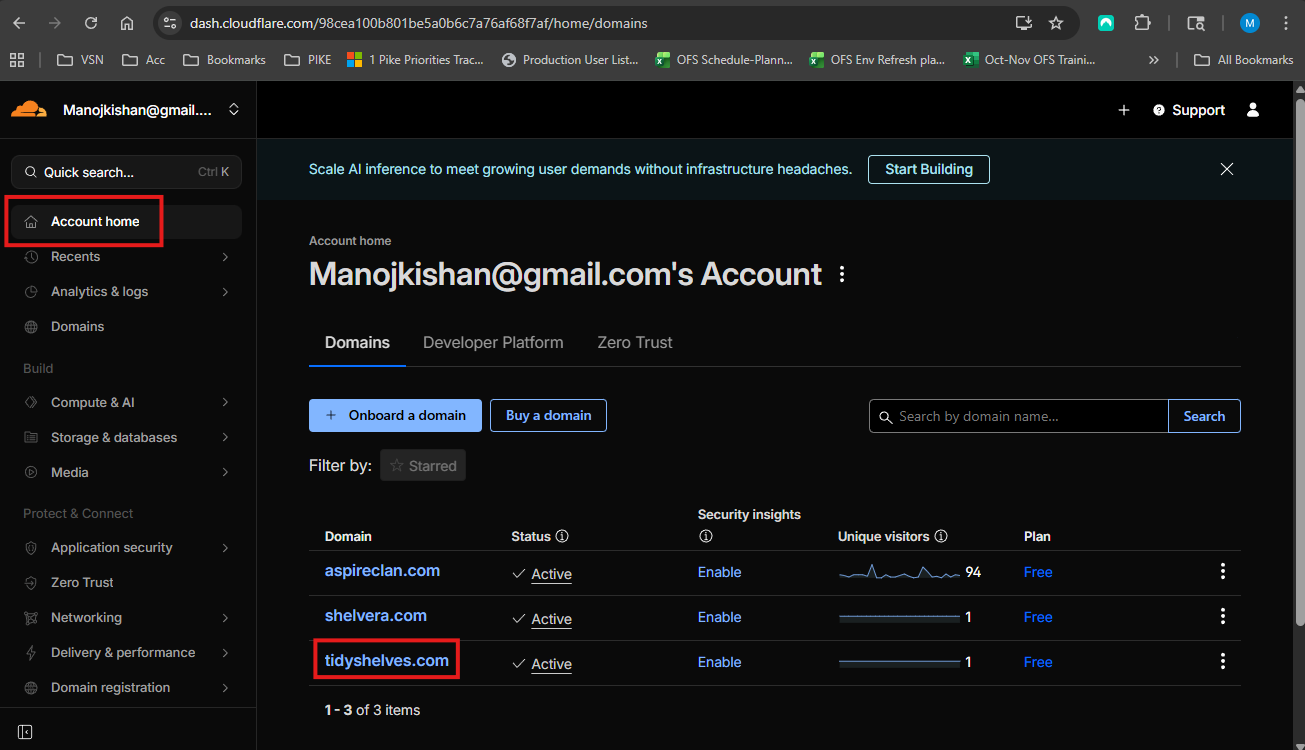
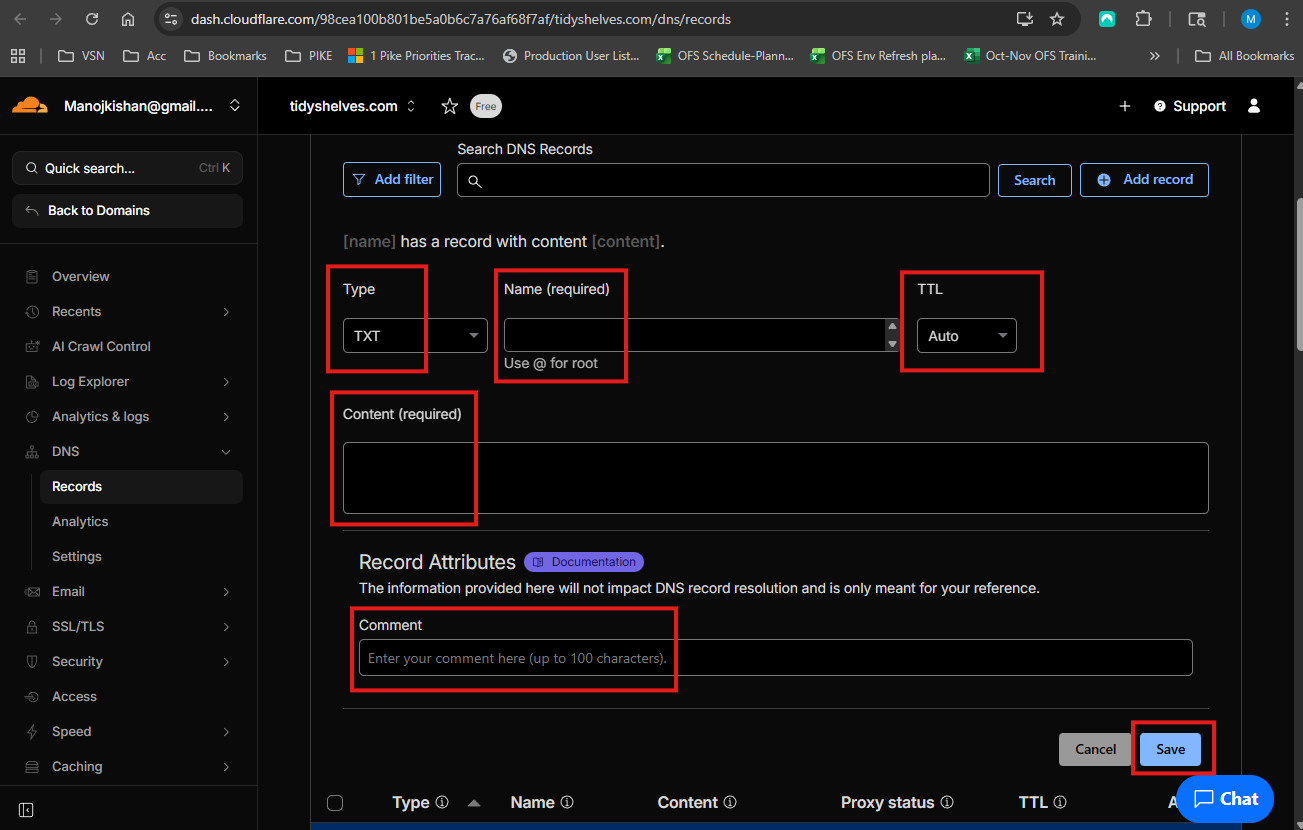
Go to DNS → Records → Add record (CNAME)
CNAMEdev.apiTarget: ⚠️ Previously Saved CNAME Host Value
OffAutoTS AZURE DEVClick Save to add the DNS record.

Records → Add record (TXT)
TXTasuid.dev.apiContent: ⚠️ Previously Saved TXT Host Value
AutoSE AZURE DEVClick Save to add the DNS record.
Azure Portal – Complete Custom Domain Setup
- Managed certificate
- Add certificate later
Go back to Azure Portal
Return to the Azure Container App Custom domains page.
Click Validate — both CNAME and TXT status should show ✓
Then click Add.
⏳ Note: Certificate creation and binding may take some time.
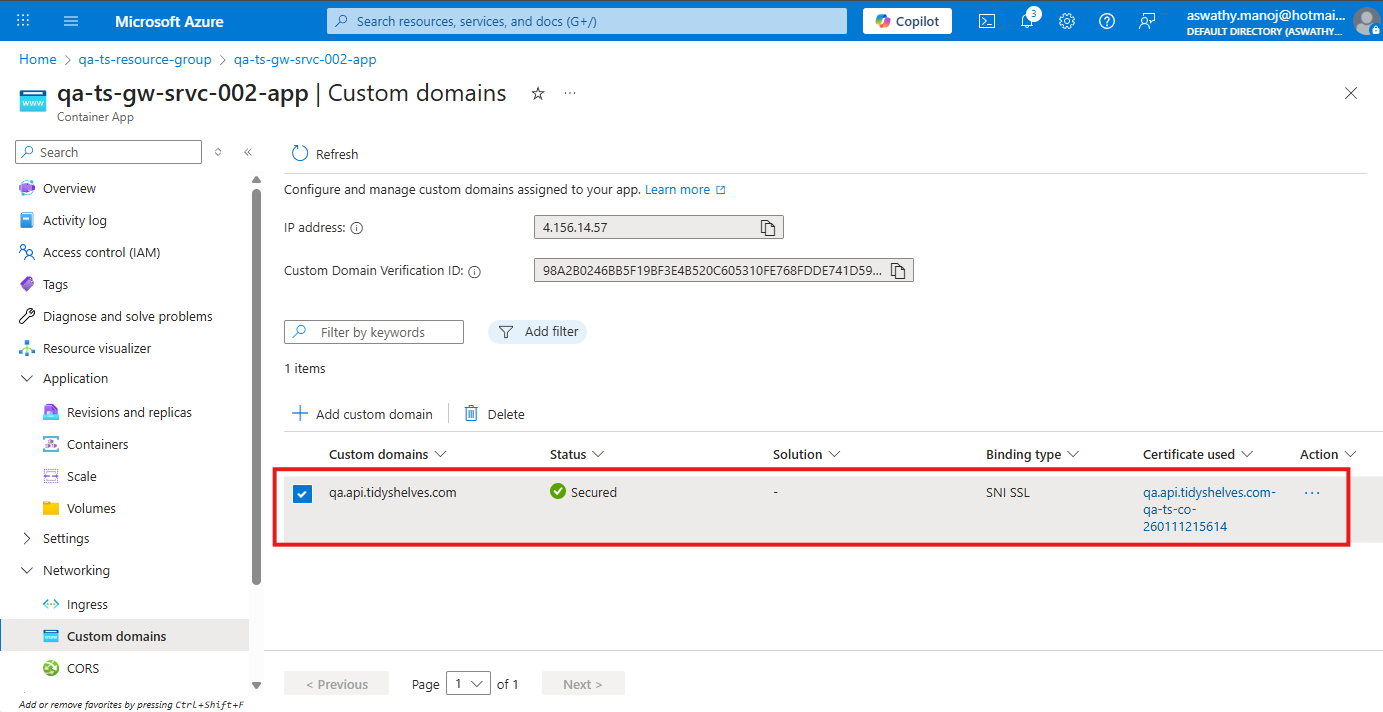
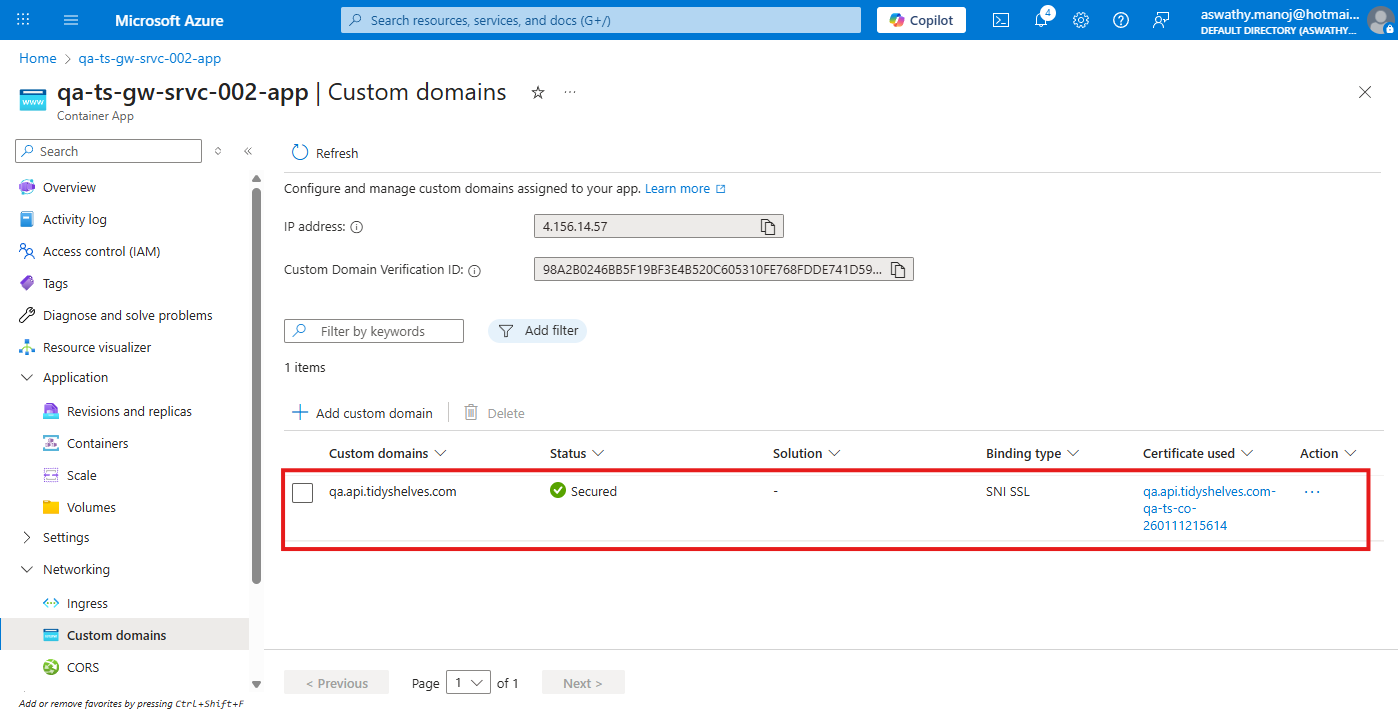
Done
After sometime, the Custom domain with SSL binding should get created and will be visible.
Go back to Azure Portal
Return to the Azure Container App Custom domains page.
Click Validate — both CNAME and TXT status should show ✓
Then click Add.
⏳ Note: Certificate creation may take some time.
Custom domain Done
The custom domain should get created without SSL biniding.
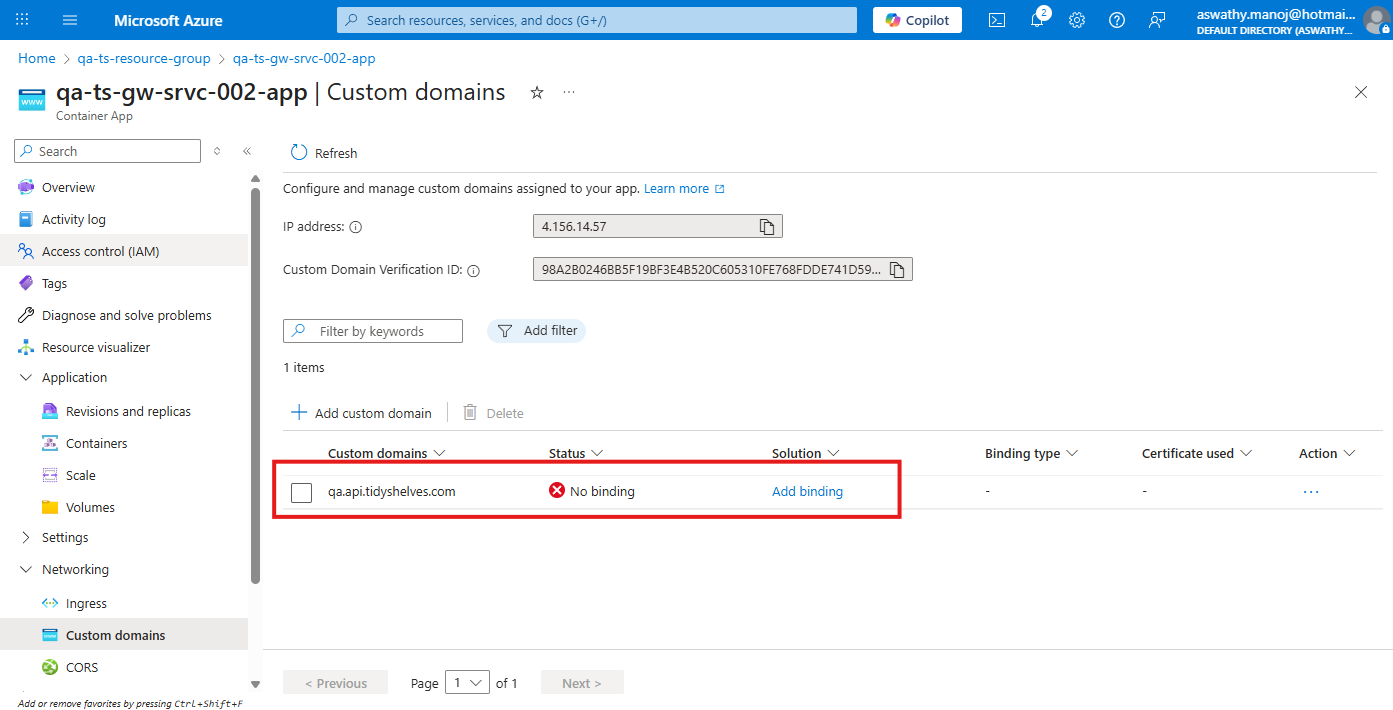
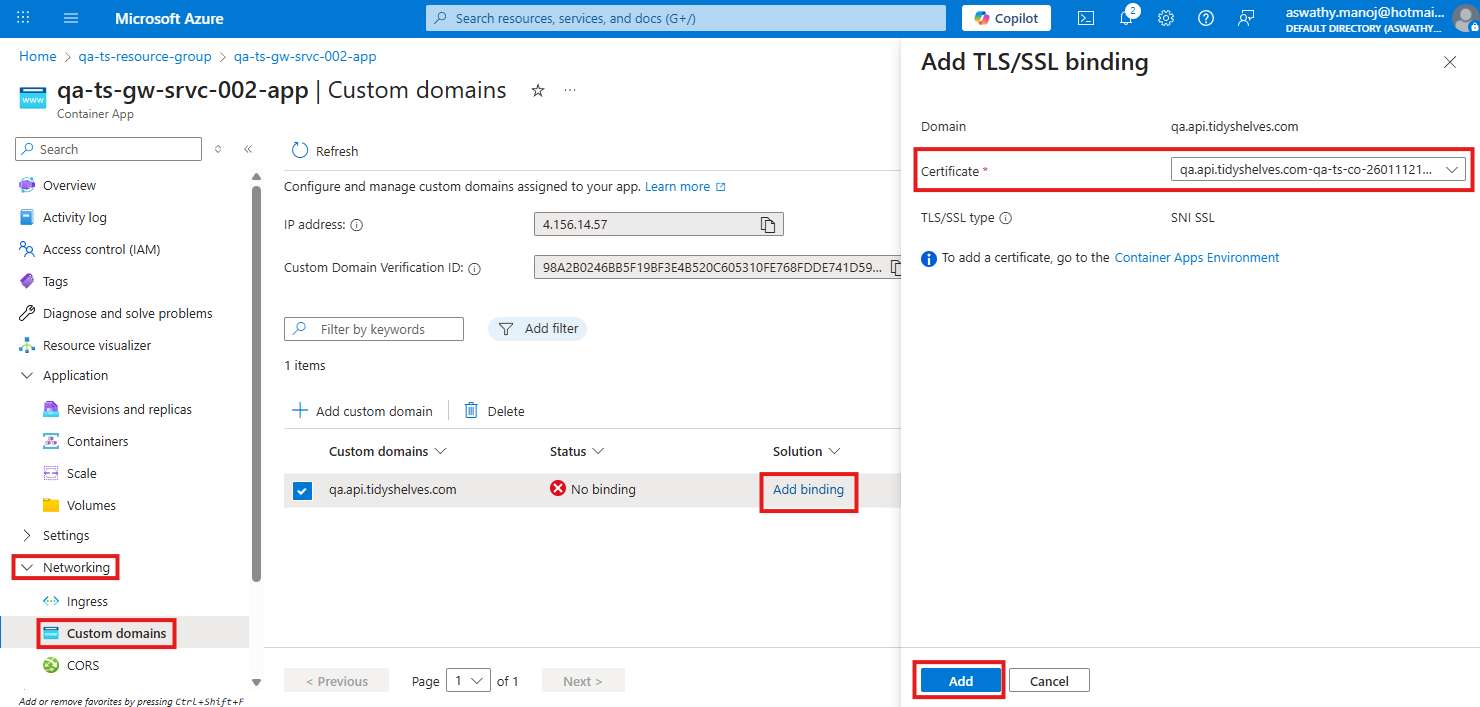
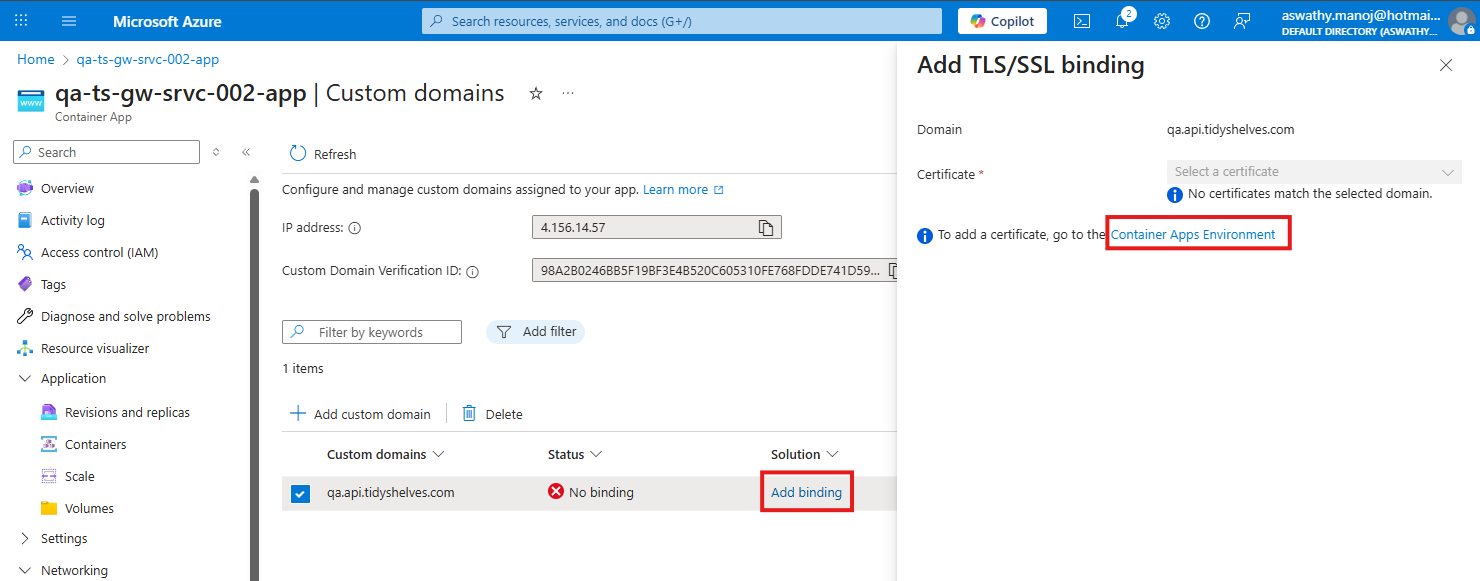
Click Add binding → Container Apps Environment
After the custom domain is added successfully, click Add binding and select Container Apps Environment as the binding target.
Add New Certificate
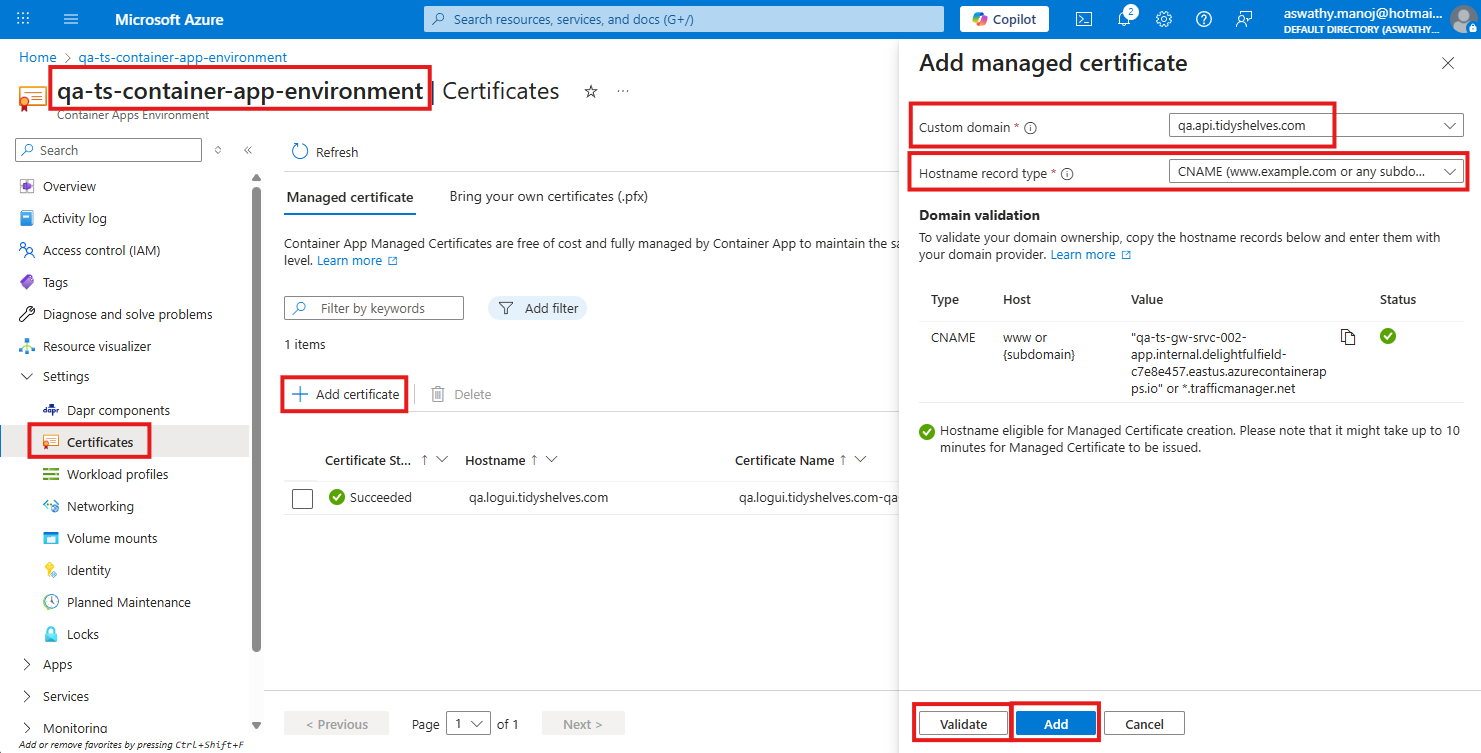
Click Add certificate.
dev.api.tidyshelves.comClick Validate — the CNAME status should show ✓
Then click Add.
Certificate Done
After sometime, the newly created certificate will be visible.
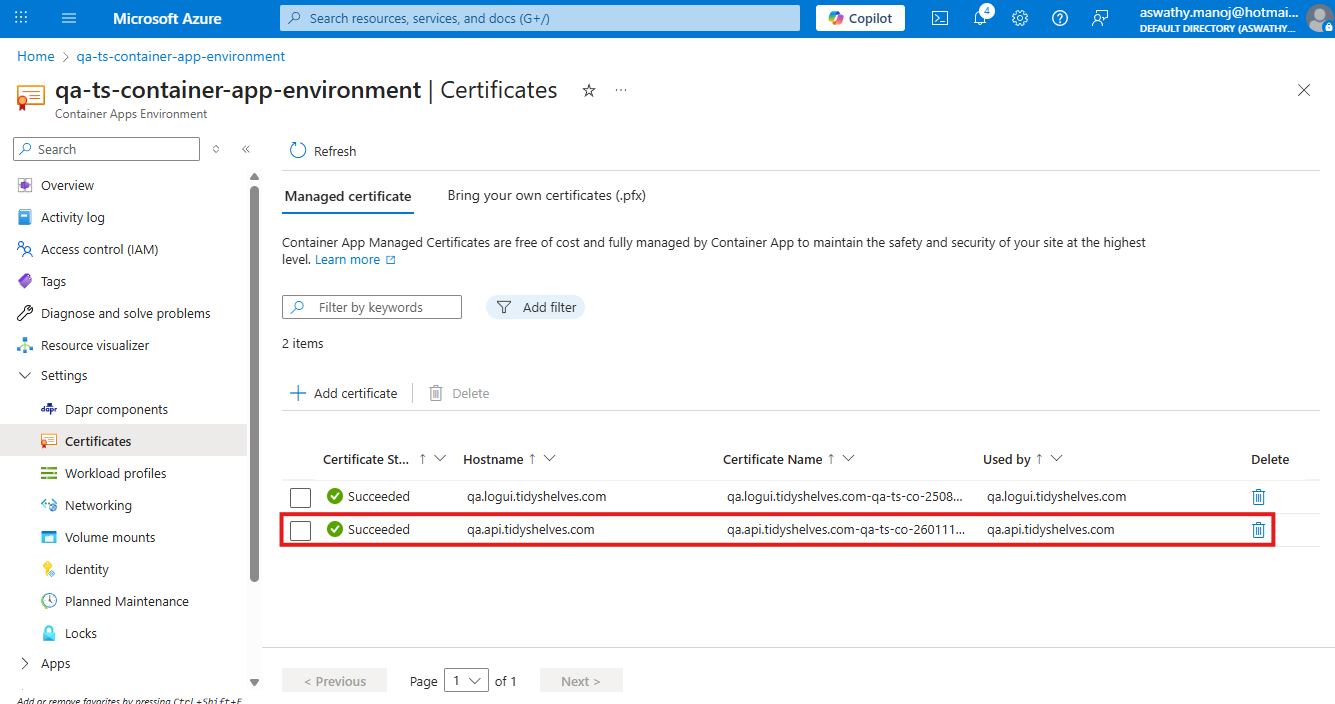
Newly created certificate