AWS Account Setup
🧱 Service Inputs
⚠️ Required Email Alias (Before Proceeding)
Create the following email alias in Hostinger before continuing with AWS account creation.
Alias:
dev.se.aws01Hostinger Email Domain:
aspireclan.com📌 Purpose:
- Required for AWS root / account-level emails
- Used for password recovery, MFA, and security notifications
- Ensures environment-level isolation and traceability
AWS Account Configuration Steps
1. Login to AWS Portal as Aspireclan AWS Root User
1.1 Open the AWS Console
Open the AWS Portal.
1.2 Sign in using the Root account
Sign in using your AWS Root account.
2. Go to AWS Organizations
2.1 Open AWS Organizations
From the AWS console, open AWS Organizations.
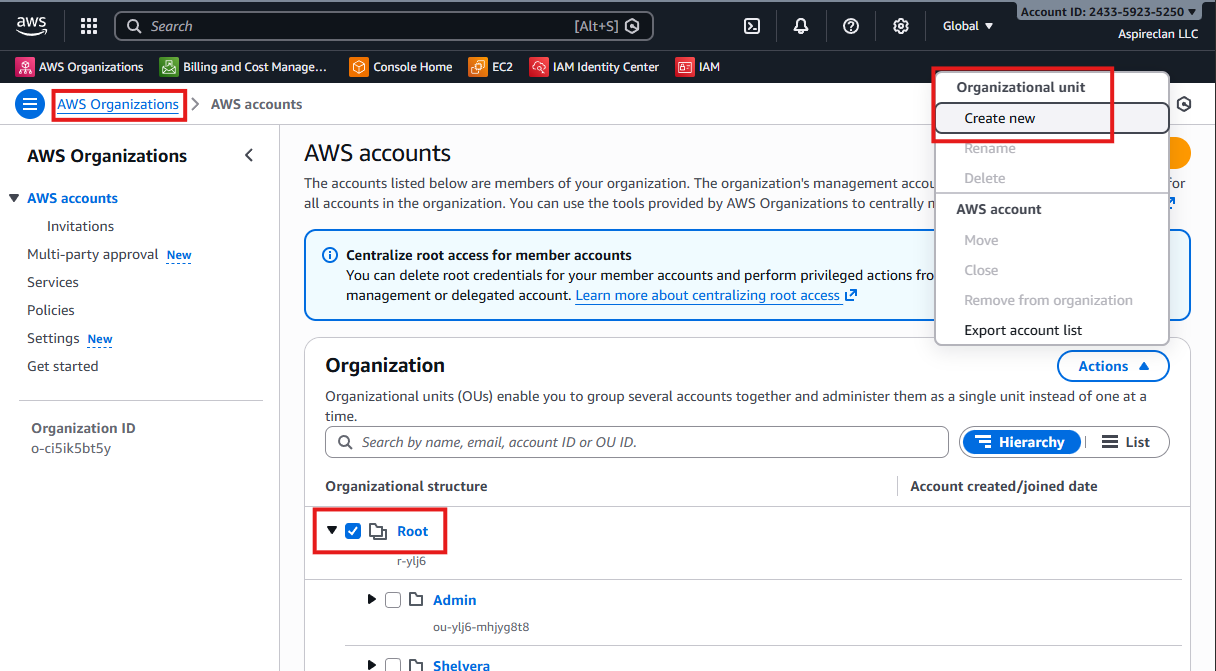
2.2 Create the Shelvera Organizational Unit (OU)
Create a new Organizational Unit (OU) named shelvera under the Root organization (only if it does not already exist).
- Select Root
- Click Actions
- Select Create new (under Organizational unit)
- Enter name:
shelvera - Click Create organizational unit
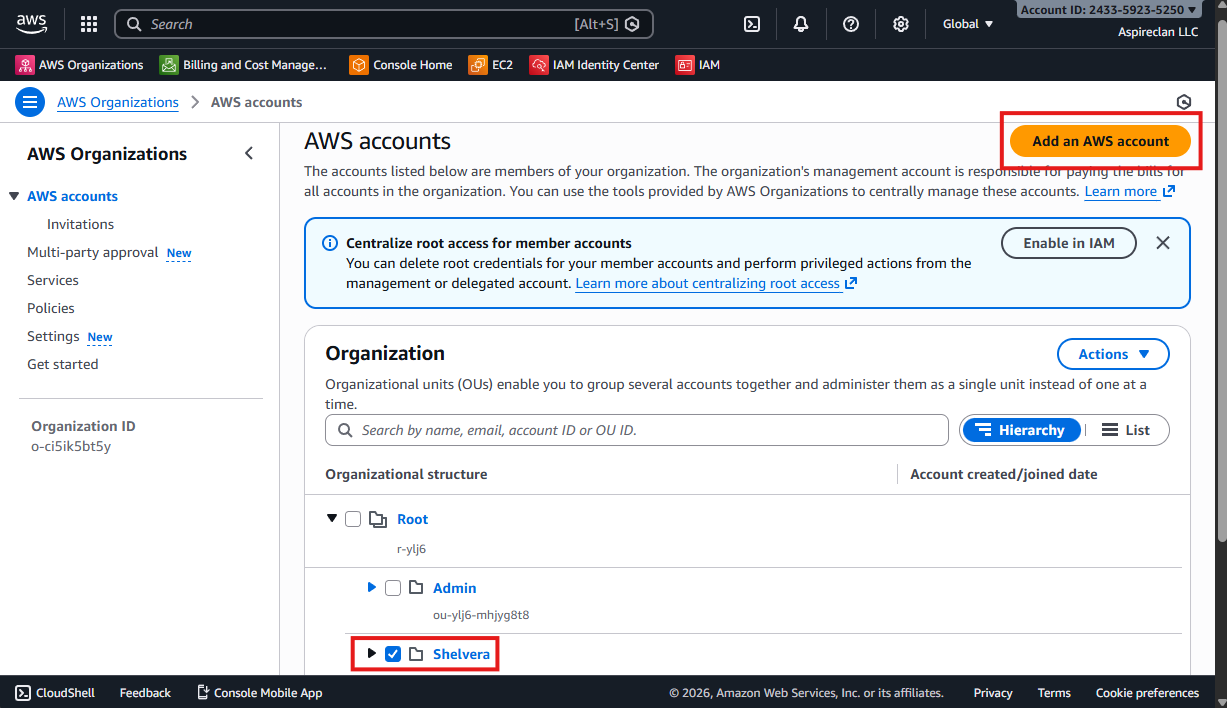
3. Create a new AWS Account under the Shelvera Organizational Unit
3.1 Select the Shelvera OU
In AWS Organizations, select the shelvera Organizational Unit.
3.2 Click “Add AWS account”
Click Add AWS account.
3.3 Choose “Create an AWS account”
Select Create an AWS account.
3.4 Enter account details (name + email)
Create a new AWS account that will be used for the shelvera platform (under the same OU).
- Account Name:
se.dev - Email:
dev.se.aws01@aspireclan.com
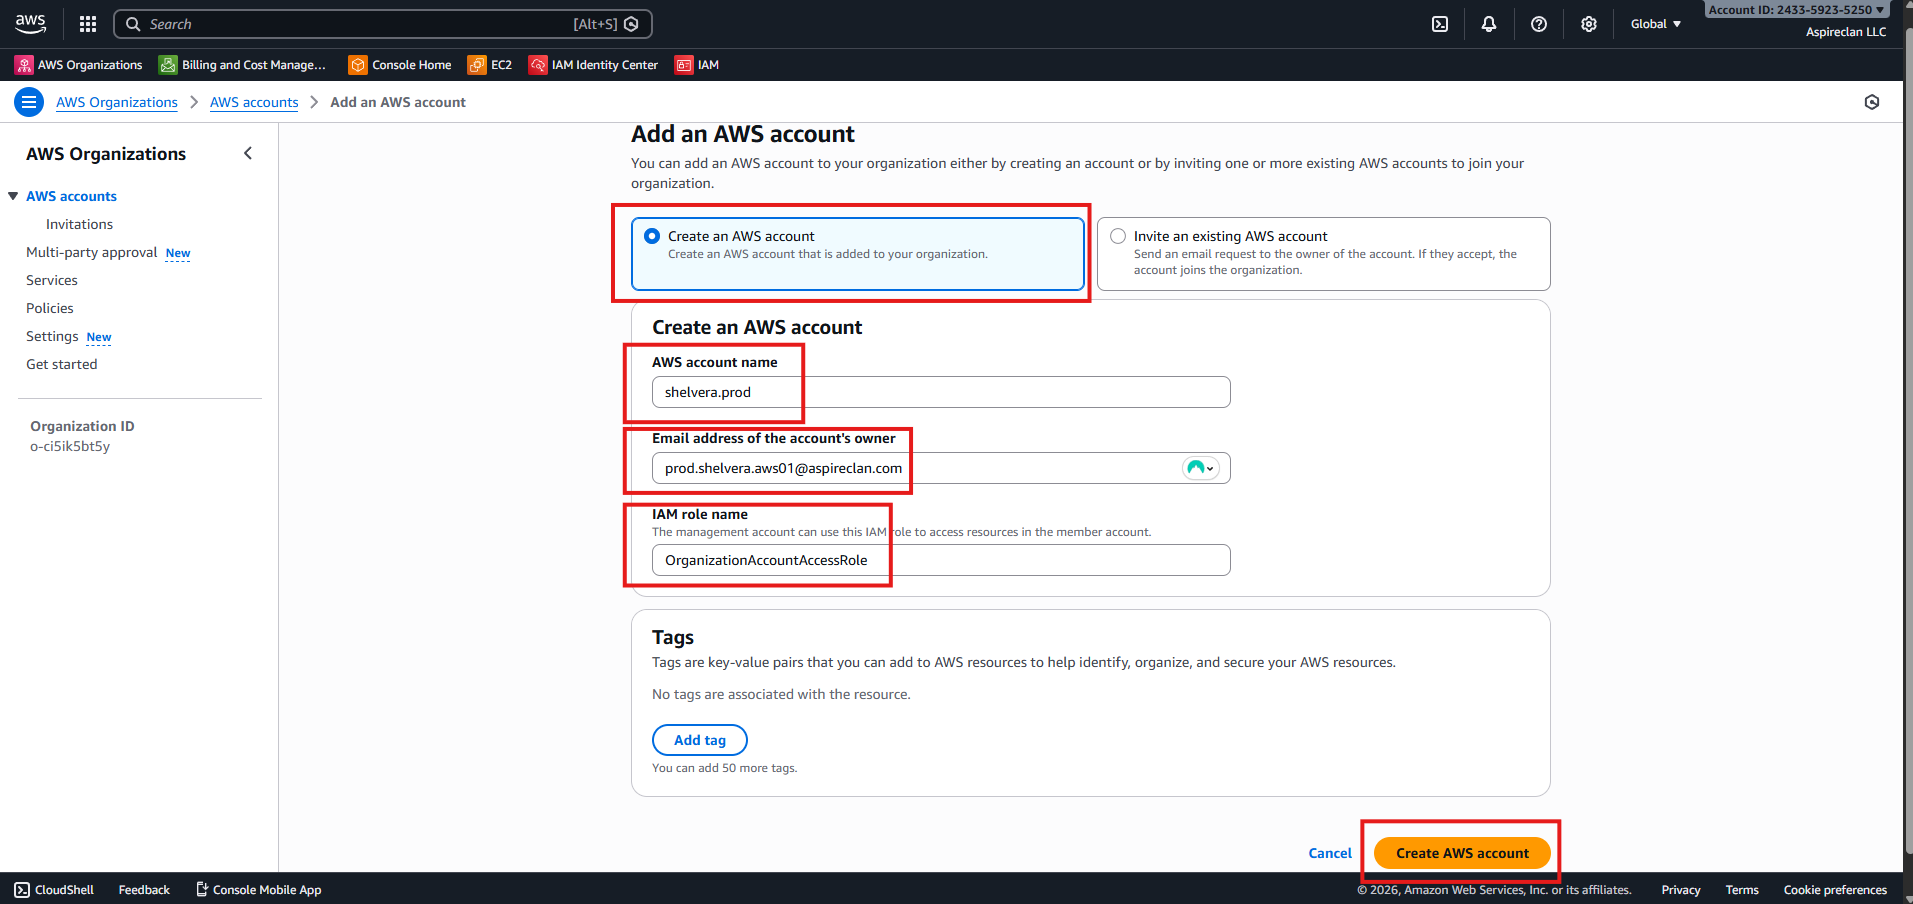
3.5 Create the AWS account
- Choose an IAM role for administration (recommended)
Click Create AWS account
AWS will begin provisioning the new account. This process may take a few minutes to complete.
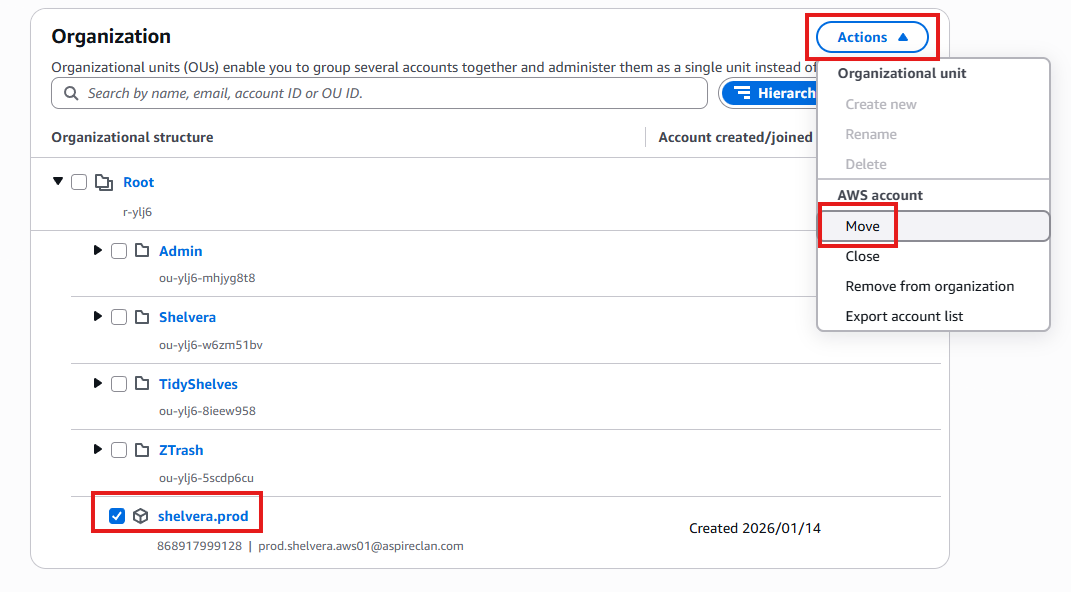
4. Move the new account to Organizational Unit
4.1 Locate the newly created account
In AWS Organizations, locate the newly created account:
se.dev4.2 Move the account into the Shelvera OU
- Select the account
- Click Actions
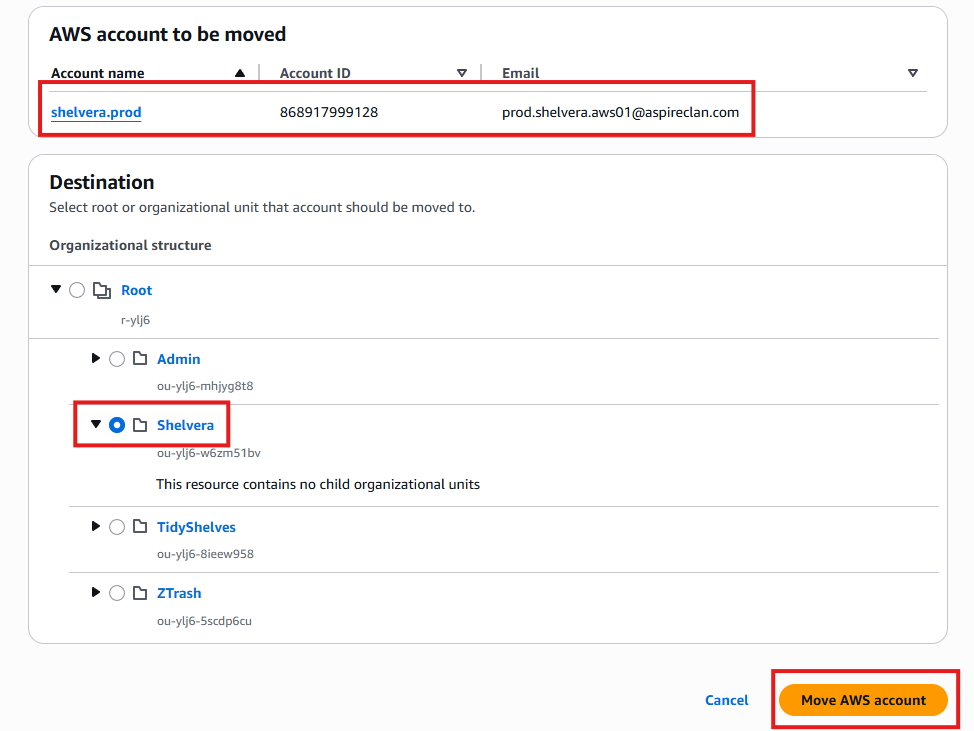
- Select Move
- Choose the destination Organizational Unit:
shelvera - Confirm the move